Over the past several weeks, I have set time aside to create a fairy journal. In a previous post, I shared that I was inspired to do this after reading about
Cicley Mary Barker’s art process.
I decided to make the journal instead of buying one. There were two main reasons for this: first, I haven’t made a journal in a long time and wanted to practice; and, second, I wanted a watercolour journal with heavy weighted paper (a minimum 300gsm). So, for this project, I am using recycled cardboard as well as an A3-sized pad of watercolour paper.
Binding the pages
When creating your journal, you need to decide how you would like to bind the pages. Because I was making a large A-4 sized journal, I felt it was best to bind them with a kettle stitch. If you haven’t seen this technique before, I recommend you watch the tutorial on
YouTube by Sea Lemon. To stitch the pages, I purchased 3.2m of multicoloured hemp and a Klasse tapestry needle kit, which I found from my local major retailer,
Big W.
To make the internal pages of the journal, I first folded each watercolour sheet in half and then, using a ruler, measured and drew dots 2cm apart along the fold. Following Sea Lemon’s great instruction, I then stitched the pages together. Binding the pages this way takes time and also I have learnt patience. To ensure that you don’t create a huge entangled mess, you need to sew slowly and mindfully.
Finally, I painted PVA glue along their sewed edges and clamped the pages together with a large clip and placed them on a flat surface, covering them with heavy books.
Making the cover
When making the cover, I cut two pieces of thick cardboard due to size (I used a postage box). The cover needs to be larger than the internal pages. Mine were around 2.5cm larger on all sides.
I wanted to make my cover forest green but vintage in style. So, I first then painted the front and back of the journal with purple acrylic paint. I used
Kaisercraft’s Kaisercolour Mauve. Once this layer was dry, I then applied a layer of Kaisercolour Green. As the box had stress lines, I decided to use them as a feature, and highlighted them using Kaisercolour Gold.
To add a touch of fairy magic, I glued wooden cuts of a fairy and trileafs, which I had also painted gold. The wooden cuts come from Kaisercraft’s Flourish Enchanted and Nature packs. If you live in Australia, you can purchase the
Enchanted packs from my online store. Once dry, I sealed the cover with a clear varnish.
Binding the book
The final stage of making the journal is to bind the pages and cover together. For this I used PVA glue. With a brush, I glued a fairly even amount of glue across the first internal page to the front cover and the last page to the back cover. Using large heavy books as weights, I then left the journal to dry.
So, I hope you will join me on this fairy adventure. If you would like to keep up to date as I create this journal, I cordially invite you to
subscribe to my e-newsletter (please embed link at: https://littleworldsofwonder.com/contact-us/)
I also invite my fellow fairy journallers, architects, and makers to join my wonder weavers circle at
https://www.facebook.com/magicalminiaturelandscapingsupplies/groups/?ref=page_internal,
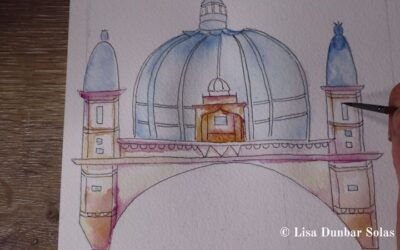
Now, it is time to open my journal and begin to paint!